主要是对spring-cloud的简单学习和搭建简单的demo
注册中心的选择
Consul 强一致性(C)带来的是
1.服务注册相比Eureka会稍慢一些。因为Consul的raft协议要求必须过半数的节点都写入成功才认为注册成功 2.Leader挂掉时,重新选举期间整个consul不可用。保证了强一致性但牺牲了可用性
Eureka 保证高可用(A)和最终一致性
1.服务注册相对要快,因为不需要等注册信息replicate到其他节点,也不保证注册信息是否replicate成功 2.当数据出现不一致时,虽然A, B上的注册信息不完全相同,但每个Eureka节点依然能够正常对外提供服务,这会出现查询服务信息时如果请求A查不到,但请求B就能查到。如此保证了可用性但牺牲了一致性。
部署
准备
下载Consul 官网 https://www.consul.io/downloads.html
安装
Windows 下安装
配置 Consul 环境变量
打开CMD终端,进入consul.exe所在目录,执行如下命令启动Consul服务。
cd C:\consul_1.3.0_windows_amd64 # 进入consul.exe所在目录
consul agent -dev # 启动服务, -dev 表示开发模式运行,另外还有 -server 表示服务模式运行
安装启动完成后,访问 http://localhost:8500,可以看到consul管理界面
Linux 下安装
安装过程详见 https://blog.csdn.net/BecauseSy/article/details/90700231
案例
新建producer(生产者)
在pom文件中添加
  <dependencies>
      <dependency>
          <groupId>org.springframework.boot</groupId>
          <artifactId>spring-boot-starter-actuator</artifactId>
      </dependency>
      <dependency>
          <groupId>org.springframework.cloud</groupId>
          <artifactId>spring-cloud-starter-consul-discovery</artifactId>
      </dependency>
      <dependency>
          <groupId>org.springframework.boot</groupId>
          <artifactId>spring-boot-starter-web</artifactId>
      </dependency>
      <dependency>
          <groupId>org.springframework.boot</groupId>
          <artifactId>spring-boot-starter-test</artifactId>
          <scope>test</scope>
      </dependency>
  </dependencies>
然后将配置文件改为yml在中加入一下配置
  server:
    port: 8511
  spring:
    application:
      name: spring-cloud-consul-producer
    cloud:
      consul:
        host: localhost
        port: 8500
        discovery:
          serviceName: service-producer    # 注册到consul的服务名称
Consul 的地址和端口号默认是 localhost:8500 ,如果不是这个地址可以自行配置,consul服务会占用8502接口,所以不要用8501、8502。 spring.cloud.consul.discovery.serviceName 是指注册到 Consul 的服务名称,后期客户端会根据这个名称来进行服务调用
在启动项上添加 @EnableDiscoveryClient,开启服务发现支持
新建Controller,在controller中添加一下代码
  @RestController
  public class HelloController {

      @RequestMapping("/hello")
      public String hello() {
          return "hello consul.";
      }
  }
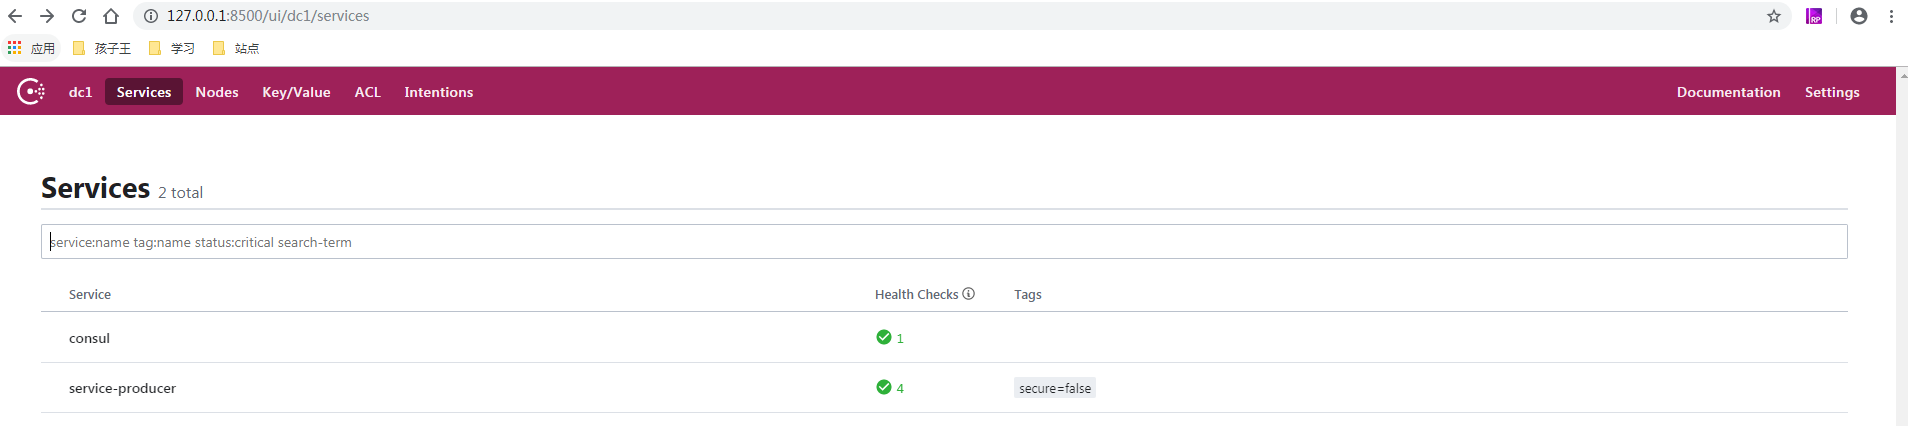
为了模拟注册均衡负载,复制一份上面的项目,重命名为 spring-cloud-consul-producer2 ,修改对应的端口为 8512,修改 hello 方法的返回值为:”helle consul two”,修改完成后依次启动两个项目,启动成功之后刷新Consul管理界面,发现我们注册的service-producer服务,并有2个节点实例。

可以看到我们注册的8511和8512两个服务提供者节点实例
## 新建comsumer(消费者)
新的的目录和producer一样
yml 配置文件中添加
   server:
     port: 8521
   spring:
     application:
       name: spring-cloud-consul-consumer
     cloud:
       consul:
         host: localhost
         port: 8500
         discovery:
           register: false    #设置不需要注册到 consul 中
消费者中添加Controller
@RestController
public class ServiceController {

    @Autowired
    private LoadBalancerClient loadBalancerClient;
    @Autowired
    private DiscoveryClient discoveryClient;

   /**
     * 获取所有服务
     */
    @RequestMapping("/services")
    public Object services() {
        return discoveryClient.getInstances("service-producer");
    }

    /**
     * 从所有服务中选择一个服务(轮询)
     */
    @RequestMapping("/discover")
    public Object discover() {
        return loadBalancerClient.choose("service-producer").getUri().toString();
    }
}
添加完成之后,启动项目, 访问 http://localhost:8521/services,返回两个服务,分别是我们注册的8511和8512。
  [{
      "serviceId": "service-producer",
      "host": "GG20J1G2E.logon.ds.ge.com",
      "port": 8511,
      "secure": false,
      "metadata": {
          "secure": "false"
      },
      "uri": "http://GG20J1G2E.logon.ds.ge.com:8511",
      "scheme": null
  }, {
      "serviceId": "service-producer",
      "host": "GG20J1G2E.logon.ds.ge.com",
      "port": 8512,
      "secure": false,
      "metadata": {
          "secure": "false"
      },
      "uri": "http://GG20J1G2E.logon.ds.ge.com:8512",
      "scheme": null
  }]
反复访问 http://localhost:8521/discover,结果交替返回服务8511和8512,因为默认的负载均衡器是采用轮询的方式
8511 和 8512 两个服务会交替出现,从而实现了获取服务端地址的均衡负载。
大多数情况下我们希望使用均衡负载的形式去获取服务端提供的服务,因此使用第二种方法来模拟调用服务端提供的 hello 方法
创建CallHelloController项目
@RestController
public class CallHelloController {

@Autowired
private LoadBalancerClient loadBalancer;

@RequestMapping("/call")
public String call() {
    ServiceInstance serviceInstance = loadBalancer.choose("service-producer");
    System.out.println("服务地址:" + serviceInstance.getUri());
    System.out.println("服务名称:" + serviceInstance.getServiceId());

    String callServiceResult = new RestTemplate().getForObject(serviceInstance.getUri().toString() + "/hello", String.class);
    System.out.println(callServiceResult);
    return callServiceResult;
}
}
在浏览器中访问地址:http://localhost:8521/call,依次返回结果如下:
因为默认是轮询方式
helle consul
helle consul two